Are you ready to put your euroshield to work? Let’s get you started!
What You Need
 You will need the following supplies:
- Euroshield 1
- Teensy Development Board with Headers version 3.0 up to 3.6 – sold by PJRC, SparkFun and other sources. Version 3.2 is recommended.
- PC or Mac for running the development tools and programming the Teensy module.
- Arduino development tools – open source provided by the Arduino foundation.
- Teensyduino development tools – open source provided by PJRC adds teensy specific functionality and a highly capable audio library.
- A USB A to microB USB cable – to connect the Teensy to your computer
- Eurorack compatible case with +12V power using a standard 16-pin ribbon connector and 8HP available.
- MIDI Adapter to connect TRS Minijacks to 5 Pin DIN MIDI (optional)
Installing the Teensy into Euroshield
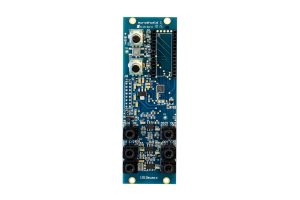
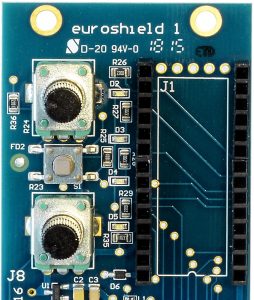
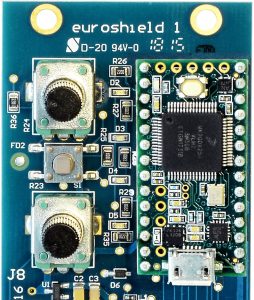
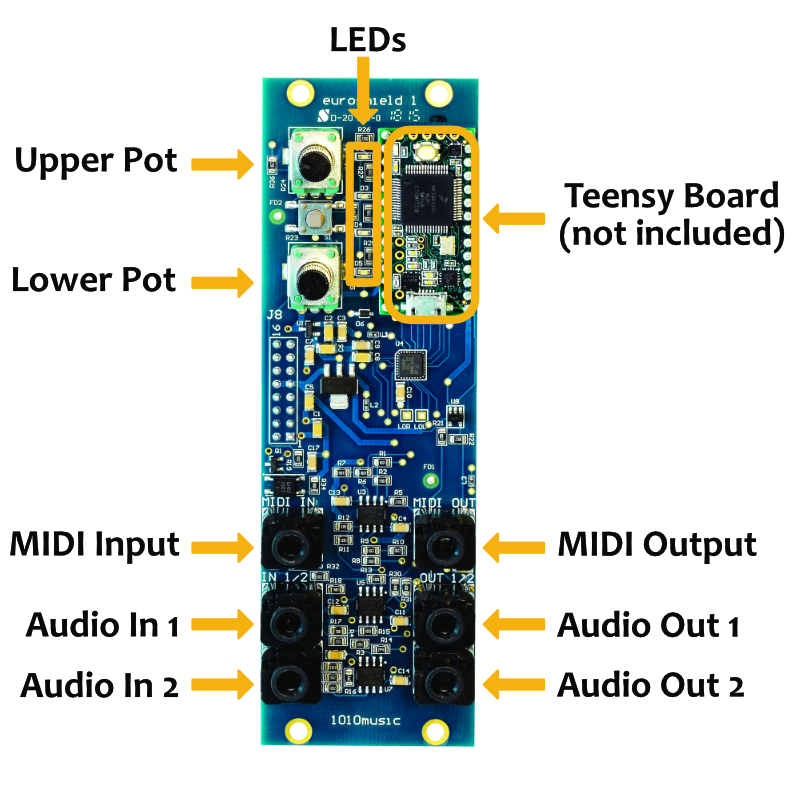
The first thing you will need to do with your euroshield is install the Teensy Development board. Insert the pins into the socket on the front of the euroshield. The pictures below show the socket before and after a Teensy Development board v3.2 is installed in the correct orientation. Some Teensy boards, such as v3.6, have more pins than shown. In this case, ensure the GND and Vin pins (those closest to the microUSB jack) are inserted into the bottom holes in the socket, and the extra pins hang off the top of the module. These extra pins are not used by euroshield.
Mounting Euroshield in Your Eurorack
Euroshield is designed to mount into a standard Eurorack in 8HP of space:
- You should always power down the Eurorack when connecting new modules.
- Attach one end of the ribbon cable to the back of the module. The connector on the module is keyed so the ribbon cable won’t fit in the wrong orientation.
- Connect the other end of the ribbon cable to the power supply for your Eurorack. The ribbon cable should be connected to the power supply so that the edge of the ribbon cable with the red line is aligned with the V pins on the power supply bus.
- Power up your Eurorack and the euroshield is ready to use.
Note:
- You can program your Teensy development board before or after it is mounted in euroshield. Just be sure to power down the euroshield before removing or inserting the Teensy board.
- Always use care when the USB cable is connected to your Teensy board so that you don’t accidentally pull on the cable and rip the teensy board out.
- Once your Teensy board is programmed, you can disconnect the USB cable and run your programs without a connection to a PC.
Accessing the Euroshield Inputs and Outputs via Code
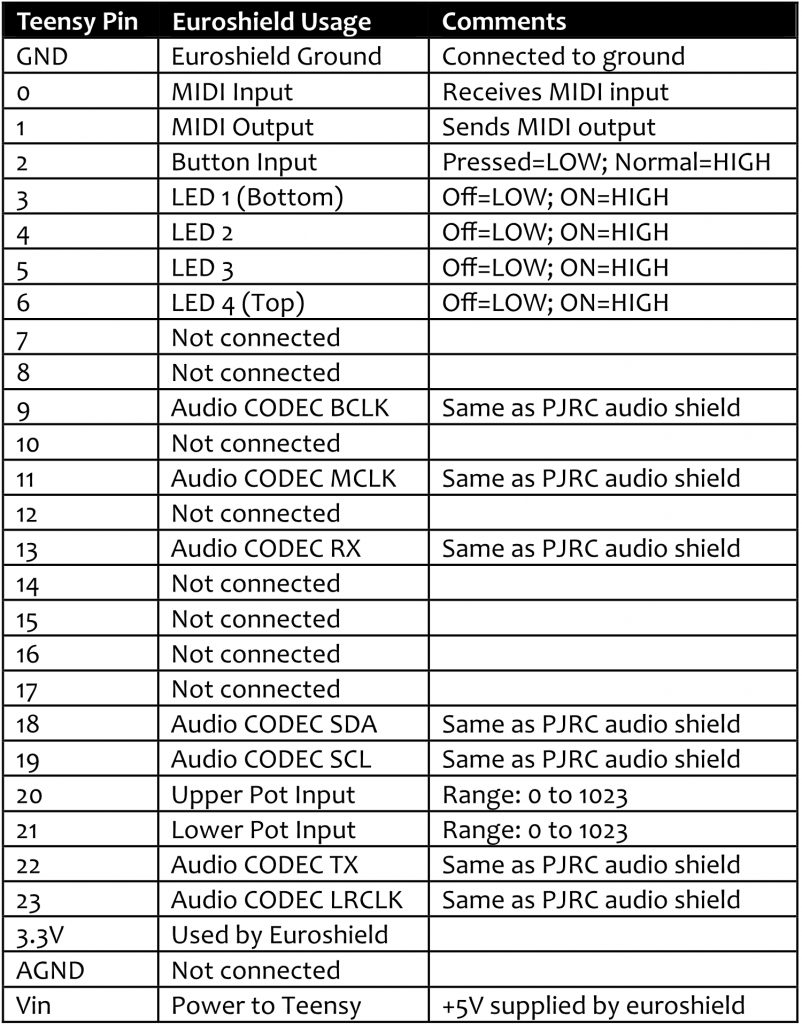
Once you start coding, you will want to be able to write code that addresses the hardware. There is sample code to demonstrate how to access each input and each output from code. The table below defines how to address the input and output controls in your code:
Eurorack and MIDI Compatibility
Euroshield was designed specifically to make your Teensy board compatible with Eurorack. You can use standard patch cords to connect the audio inputs and outputs to standard Eurorack level audio or CV signals. The MIDI signals are also compatible with mini TRS audio jack cables. Please be aware, however, that there are two different competing systems for mapping MIDI signals to mini TRS audio jacks, and you may need a MIDI adapter to connect to some MIDI devices. You can learn more about MIDI Compatibility in our blog post on the subject at https://1010music.com/stereo-minijacks-midi-connections-compatibility-guide. You can use standard TRS mini audio jack cables for MIDI connections between euroshield and all 1010music modules.
Reference Materials
One of the great things about using a Teensy is that there is a lot of documentation readily available for it. Euroshield fully supports the Teeny Audio Library, which provides many examples of working code. Here are some resources to help you on your way:
- The Arduino Integrated Development Environment (IDE)
- The Teensyduino Add On for the Arduino Development Tools
- Getting Started with Teensy
- The Teensy Audio Library
- Arduino Language Reference
- Sample Code for Euroshield
- Guide to the C++ coding language
- Eurorack Buying Guide
- Euroshield Community
- Other 1010music Eurorack Modules